
Getting started using git can seem a bit daunting at first. Trust me; I have been there. When I started coding in 1996, I didn’t know that version control was a thing—even though I was doing it. Now, by doing it, I mean saving my index.html as such; index.html, index1.html, index2.html—lol. I even saved all the .txt files. Oh, how times have changed. Anyhow, today we are lucky enough to have a great solution to track our versions and changes.
So what is git? Git is a distributed version control system to help track changes and manage code. Great, what is GitHub? GitHub is a cloud storage provider that allows you to host and maintain code in a public forum. But only if your repos are public.
Follow along with me as I walk through getting up to speed using git and GitHub.
Different Scenarios
There are three different scenarios that come to mind when learning git and GitHub. These are things that you will probably be doing at some point in your career. They are as follows:
- Working on your own projects
- Committing code to your organization’s repo(s)
- Contributing code to an open-source project
All three of those situations require varying levels of knowledge in terms of using git and GitHub. Before we break any of that down, if you are using the terminal or CLI (command line interface) to learn git, you should know some introductory Linux commands to set things up.
Introductory Linux Commands
You will most likely want to set up a folder if you are creating files from scratch. You might be running npx, npm, or yarn to scaffold out your project. All of these things are done in the terminal you are working in. Below are some intro commands and what they mean:
# Command line shortcuts
pwd    # Lets you know where you are on the system ("print working directory")
clear  # Clears out the terminal if it gets too cluttered
mkdir  # Creates a folder inside any current directory or location ("make directory")
touch  # Creates a file inside any terminal or directory
cd     # Moves you forward or backward depending on where you are in your system
ls     # Lists files and folders in the current directory
Great! Now we have a basic understanding of some Linux commands to get us started working in the terminal. Let’s move on to working with git.
Git Setup
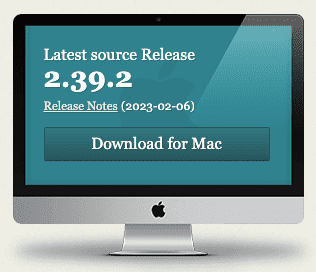
You have an idea for a project you want to start, in any language. We know one thing about that project: It is something awesome, and you want to start tracking it. You also want to push it to GitHub. So you can use it in your arsenal when the time comes to show it off to a potential employer. We need to get git setup on our machine first. Go to https://git-scm.com/ and download the latest release for your operating system (I am on a Mac). At the time of this writing, it will be 2.39.2.
Once that is downloaded, go through the install steps. Keep the defaults for now and everything should go smoothly. After git is set up, we can move on to getting our project set up.
Project Setup
In this example, I am going to be showing a project with a js folder and file, css folder and file, and an index.html file. Your mileage may vary.

Here I am using the tree command to show the structure of the git-intro directory. To install tree on a Mac, you need to have brew installed.
Perfect, we have our structure set up with the folders and files we need. If we want to start tracking these artifacts, we need to have git initialized in the directory. In order to do that, we run git init.
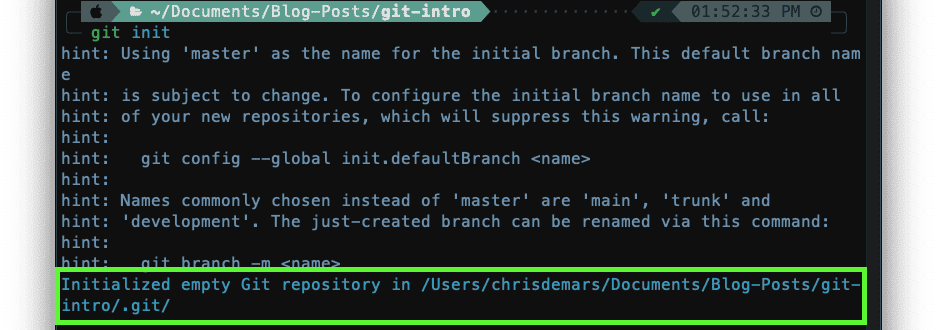
Above, you can see that you will get a prompt to change the name of the branch to main. It would be wise to make that chance using git branch -m main. Now we are ready to start making changes to our files.
Adding and Tracking Our Changes
We can start adding some code to our files and learn a bit more about some git commands to help us along the way. Below I have scaffolded out a project in the index.html file, added some styles to the CSS file, and wrote a console.log statement in the JS for simplicity.
The following screenshots will all be inside VS Code and the integrated terminal.

We are going to run git status to see if anything is being tracked yet. Git status is the most important command to run. I run git status after everything I do just to make sure I don’t make any mistakes. As a result, I can visually see where I am in the process from adding to pushing changes.

Git is telling us a few different things here after running git status. We are on the main branch, there are no commits yet or code that is ready to be moved to the next level. It is telling us that we have untracked files and folders and that we need to run git add in order to start tracking the changes. So let’s do that.

By running git add, we are telling git to start tracking changes on any of the files in these directories including the root directory. Running git status checks your work.
One thing to be sure of is that you are in the root directory of the project when doing anything git-related. If not, you might only add a file or a directory and the rest of the project will be untracked.
If you want to “unstage” the files, you can run git rm —cached to stop tracking.
Let’s say we make a change to a file; we have to add it back to staging in order to track it.

If we change a file as we did with index.html, it has to be added to the working directory in order to be tracked, so we run git add index.html again. Once we do that, the index.html file will move back into the working directory to be tracked and eventually committed.
I think we are ready to throw this up on GitHub before we go too far and have too many things that are untracked/tracked. We want to make an initial commit to get it up and running inside GitHub. You can commit locally, but the changes will be stored locally and nowhere else.
GitHub Setup
Let’s go over to GitHub and create a repo. If you haven’t created an account yet, be sure to do that first. For these GitHub examples, I will be using my account. When you are on your profile, you will see a “+” sign in the top right corner. If you click on that, you will be presented with a dropdown with some options. You want to click on “New repository.”

Clicking on “New repository” will bring you to a page that looks like the one below. This page is where you can set up a remote repo—a cloud code storage—on GitHub. What is on GitHub is not the same as what you have locally. Not until you push your changes up from your local repo, or pull down changes from GitHub to your local repo. Using GitHub is a two-way street.
Give your repo a name, something memorable. Leave “Public” selected unless you really want to make your repo private, which you most likely won’t need to do. You can add a README if you want, but at this point, it isn’t necessary. You also don’t have to add a .gitignore or .LICENSE at this point. Once you are done, click “Create repository.”

Since we have an existing repo ready to be pushed up to GitHub, we can copy and paste these commands in our terminal, sans the branch name change since we did that already. But first, there is one very important git command we need to run: git commit.
Running Git Commit
We added files and folders to be tracked, and we have our repo ready and set up on GitHub. Now the only thing we have left to do is commit and push our changes, right? That’s right. Let’s go back to our terminal and run git commit on all the files and folders, then run git status to see where we are at.

There are a couple of other things you see here that follow the git commit command. Make sure to add a -m with a message in quotes after the commit command. This is a message flag with your message on what the commit is. If not, git will throw you into the default editor on your machine. That default editor could be vim, neo, etc. If you aren’t familiar with either of those, exiting out of them can be a pain in itself. Never forget the -m.
Most of what is in the output you really don’t need to know. It is saying that three files have changed and are committed and ready to be pushed. Let’s push them up to GitHub.

We did it! Nice, we have all our code pushed up to GitHub on the main branch. Now, if you go back to GitHub, you will see that the repo you created now has files and folders and is in sync with your local repo.

Wrapping Up
As we can see, getting set up with git and GitHub doesn’t have to be painful. With a bit of knowledge of Linux commands and a handful of intro git commands, we can get the code we are working on locally to a remote location in GitHub.
In the following posts, I will take us through how to get started working in an environment, and working on an open-source project. I will cover more in-depth topics like forking, cloning, branching, pull requests, and squashing and merging code!
Get Split Certified
Split Arcade includes product explainer videos, clickable product tutorials, manipulatable code examples, and interactive challenges.
Switch It On With Split
The Split Feature Data Platform™ gives you the confidence to move fast without breaking things. Set up feature flags and safely deploy to production, controlling who sees which features and when. Connect every flag to contextual data, so you can know if your features are making things better or worse and act without hesitation. Effortlessly conduct feature experiments like A/B tests without slowing down. Whether you’re looking to increase your releases, to decrease your MTTR, or to ignite your dev team without burning them out–Split is both a feature management platform and partnership to revolutionize the way the work gets done. Switch on a free account today, schedule a demo, or contact us for further questions.