
What’s going on all you amazing developers out there in the web world? Thanks for diving into this third post in a series of using git and GitHub in your workflows. Did you read Git and GitHub at Work? If not, head over there and check it out!
Let’s move on to the third installation and chat about using git and GitHub in Open Source projects. Throughout this article I will be referring to pull requests as PR’s. There are plenty of projects out there that you can choose to work on. If you are having an issue looking for things, there are a few options out there for you.
- My First PR — This is a great resource for first timers looking to get their first PR.
- Searching directly on GitHub in the Explore tab and then choosing Topics. See image below the list.
- Participating in Hacktoberfest. This is a virtual event that is organized by Digital Ocean, appwrite, and Docker. Great for first time contributors looking for their first PR.

Finding a Project
I covered this in the numbered list above but finding a project is a rather painless task. If you search around GItHub, or if you use software that you really like, there are always ways to improve it.
A lot of language repos like Angular, React, etc. are open to taking PR’s. I personally have contributed to the accessibility of the RxJS docs. It was a great feeling giving back to the community and improving the docs for everyone.
If you do some digging, you will find a project to contribute to!
Project Found
In the example screenshots I will be using the Split Vanilla JS SDK repo.
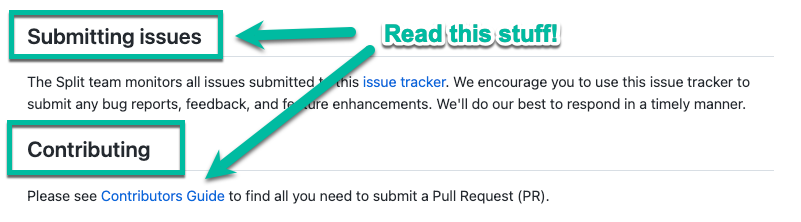
Make sure that you read through the README carefully. Most, if not all open source projects have a Contribution Guide. This should be followed verbatim. Check to see if there is a section in the README about submitting issues to. Some projects want you to submit the issue first, before actually contributing. But remember, even if you submit an issue, that IS contributing even though you aren’t submitting a PR.
Fork It!
Working on an open source project varies slightly when it comes to the flow of contributing. If you are working in your org’s repo, chances are you are listed as an IC (individual contributor) and can just clone the repo.
When it comes to open source, you should fork the repo first. Forking a repo is the process of making a copy of it and moving it over to your personal GitHub profile. This way you can work on it in isolation without worry of breaking anything in the original project repo.

I forked the repo and if you were wondering how you forked it properly, your repo name will look like this:

It will have the fork icon at the beginning, it looks like a Lobster. Below that it will say where it was forked from. Great! Now we have the repo forked. Let’s take a look at the code and run the project and see what’s what.
Maybe you can fix an issue. Maybe the docs seem a bit off. Maybe something can be improved. All of these things matter when it comes to working on open source software. I am a stickler for spelling and words and I noticed that the word “Javascript” in the README should have the “s” uppercase in “Script”. I am going to fix that and submit a PR back to the repo.
Start Slangin’ Code
Now that we have the repo forked to our own GitHub profile we can clone the repo and start working on some code. If you read the last article I released, it went through cloning and how that works. This article won’t cover it. Head over to Git and GitHub at Work to check that out.
Open the project in your favorite code editor; I use VS Code. Make sure that all the code you are working on is up to date with the project repo and run it. In the docs I am going to be fixing, I just have to make sure that the README loads. I will still follow the contribution guidelines and run any tests just for the sake of proper participation.
Once you have the code open in your code editor, create a meaningful branch. And start doing your thing!
I made the changes in the docs and used the built-in Markdown preview feature in VS Code to see the changes. Everything looks good, time to submit a PR!

Get Those Changes Up!
I made sure everything works and pushed my changes up to my GitHub project. I had to set the upstream of the remote as well. This is something you will always have to do when working on your org’s project or an open source project.
git push --set-upstream origin demars/changes-spelling-of-javascriptHead to your GitHub repo and click on the Pull Requests tab and you will see that your changes are ready for a “Compare & pull request”.

You can see that I want to have my changes pulled into the development branch. That is a branch cut off the main branch in the JavaScript repo. Everything looks good. I added a short, descriptive title in the style of a conventional commit. I also filled out the PR template that accompanies the repo. Some projects have this, some don’t. Be on the lookout for another blog post dropping that will be all about PR templates.

It’s also a great practice to add screenshots of the changes you did as well so the reviewer has a quick visual into the work accomplished.
One last check to make sure everything is ok and if it is, smash that create pull request button!

By now you should be on the open pull requests page and you will see that your PR is in open status. Now all you have to do is wait for tests to run and someone to review your changes. If all looks good, it will be merged by a maintainter of the project and be closed out.

Congratulations! You submitted your first PR to an open source project. Give yourself a huge pat on the back. Your work will be forever valuable. Keep pushing, keep giving back! The open source community with thank you.
Wrapping Up
Working on open source projects can be extremely rewarding. Especially when it is code and software that you genuinely like and use. Keep working on making the web a better place. Knowledge belongs to the world, give back.
Next article coming from yours truly will be on pull request templates. We will learn why you need one and how to craft one for your project’s repo.
Get Split Certified
Split Arcade includes product explainer videos, clickable product tutorials, manipulatable code examples, and interactive challenges.
Switch It On With Split
Split gives product development teams the confidence to release features that matter faster. It’s the only feature management and experimentation platform that automatically attributes data-driven insight to every feature that’s released—all while enabling astoundingly easy deployment, profound risk reduction, and better visibility across teams. Split offers more than a platform: It offers partnership. By sticking with customers every step of the way, Split illuminates the path toward continuous improvement and timely innovation. Switch on a trial account, schedule a demo, or contact us for further questions.