The swift code for this article is available here. It is built on the WWDC 2021 watchOS Workout App example, with Swift 5 in Xcode 14.2, supporting iOS 15.0+, and watchOS 8.0+.
You have just successfully built an excellent watch app. Congratulations! Pretty soon, it will be time to update, introduce new features, and roll out some enhancements. How can you be confident that your new ideas will appeal to your users and attract new ones? Will your planned features be useful and easy to adopt? Will they flow naturally with your usage?
The best way to know this is to know how your customers are presently using your watch app. This will tell you which features of your app are under-utilized and could be removed with minimal impact, while you focus your development on what is exciting.
How can you turn on this two-way conversation? You can do this with event tracking in the Split Feature Data Platform™. It powers feature flag management, software experimentation, and continuous delivery.
This article will guide you to easily set up event tracking in your swift code for watchOS. Then we’ll show you how to measure and analyze these events within the Split Metrics impact dashboard. Along the way, you’ll see the potential to return valuable user feedback that will turn on confident data-driven, feature development for you, the developer.
Ready to dive in? Our starting point will be the WWDC 2021 Workout App example. We will add Split event tracking to learn which are the most popular workout selections. Let’s get started.
To code along, you can download the watchOS Workout App project from WWDC21 WorkoutApp on developer.apple.com, or clone our demo on github and switch to the Split_event_tracking_starting_point tag.
Importing the Split SDK Into Your Xcode Project
In the Xcode project click File | Add Packages… In the Search field of the dialogue window, paste the URL for the iOS client flavor of Split: https://github.com/splitio/ios-client and click “Add Package”.
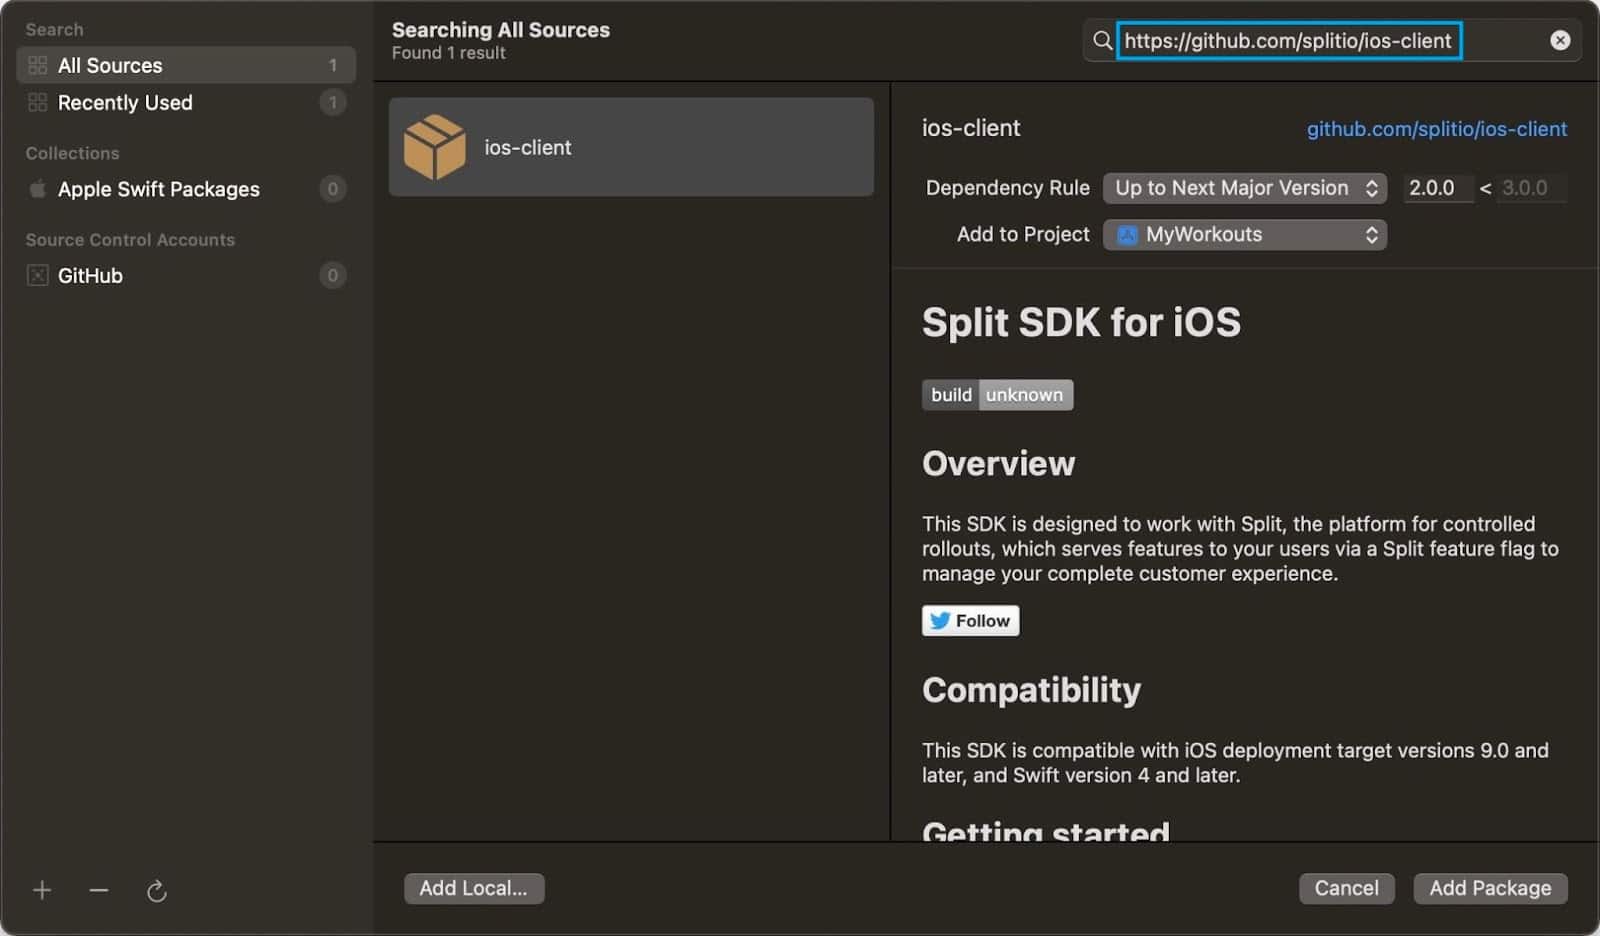
Click “Add Package” once again in a second dialog window, and you will see the Split package dependency in the Project Navigator.
Adding a Singleton Class for Wrapping Split

We’ll add a single point of communication with the Split SDK. To do this, add a new .swift file to the Controller folder and call it SplitWrapper.swift.
Then, populate SplitWrapper.swift with the following code:
/*
 Abstract:
 The wrapper that interfaces with the Split SDK and ensures
 that a SplitFactory is instantiated only once per session.
*/

import Foundation
import Split

class SplitWrapper: ObservableObject {

    static let instance: SplitWrapper = {
        return SplitWrapper()
    }()

    let factory: SplitFactory

    @Published var isReady: Bool = false
    @Published var isReadyTimedOut: Bool = false

    private let apiKey = "[front-end (for client-side) Split API Key goes here]"

    private init() {
        let key = Key(matchingKey: UUID().uuidString)
        let config = SplitClientConfig()

        /*
         Set the time limit (in milliseconds) for Split definitions to
         be downloaded and enable the .sdkReadyTimedOut event.
        */
        config.logLevel = .verbose
        config.sdkReadyTimeOut = 1000

        factory = DefaultSplitFactoryBuilder()
            .setApiKey(apiKey)
            .setKey(key)
            .setConfig(config)
            .build()!

        factory.client.on(event: .sdkReadyTimedOut) { [weak self] in
            guard let _ = self else { return }

            /*
             The .sdkReadyTimedOut event fires when:
             1. the Split SDK has reached the time limit for downloading the Split definitions, AND
             2. the Split definitions have also not been cached.
            */
            DispatchQueue.main.async {
                self?.isReadyTimedOut = true
            }
        }

        factory.client.on(event: .sdkReady) { [weak self] in
            guard let _ = self else { return }

            // Set a flag (a @Published var) when the Split definitions are downloaded.
            DispatchQueue.main.async {
                self?.isReady = true
            }
        }
    }

    /*
     Retrieves the treatment for the given feature flag (split), as defined in the Split Management Console.
     Parameter: `split`: The name of the split, as defined in the Split Management Console.
     Warning: If the Split definitions were not loaded yet, this function will return "CONTROL".
    */
    func eval(_ split: String) -> String {
        return factory.client.getTreatment(split)
    }

    /*
     Sends an event to Split Cloud where it is logged.
     Parameter: `event`: The string that will be displayed as the event name.
     Important: For the event to be viewable in the Split Management Console,
     it must be tracked in the context of a feature flag (split). Split
     associates the event with the feature flag and displays the events
     in the given feature flag's 'Data hub'.
    */
    func track(_ event: String) -> String {
        return
            factory.client.track(trafficType: "user", eventType: event)
            .description
    }

    /*
     Sends the data stored in memory (impressions and events) to Split
     cloud and clears the successfully posted data. If a connection
     issue is experienced, the data will be sent on the next attempt.
    */
    func flush() {
        return factory.client.flush()
    }

    deinit {
        destroy()
    }

    /*
     Gracefully shuts down the Split SDK by stopping all background
     threads, clearing caches, closing connections, and flushing
     the remaining unpublished impressions and events.
    */
    private func destroy() {
        return factory.client.destroy()
    }
}Let’s take a moment to look over the SplitWrapper class.
The SplitWrapper implements the singleton pattern, as it exposes a static instance variable and has a private init function. This ensures that the Split SDK factory is (correctly) initialized only once during the lifetime of the app.
For the convenience of updating our Views automatically by the Framework, we also implement the ObservableObject pattern. This sets us up to instantiate the SwiftWrapper in the root of our application.
In MyWorkoutApp.swift, add the following declaration:
@StateObject private var split = SplitWrapper.instanceWe will pass this variable to all descendants using the environmentObject function of the NavigationView. As a result, our MyWorkoutsApp.swift file will look like this:
/*
 See LICENSE folder for this sample's licensing information.
 Abstract: The entry point into the app.
*/

import SwiftUI

@main
struct MyWorkoutsApp: App {
    @StateObject private var workoutManager = WorkoutManager()
    @StateObject private var split = SplitWrapper.instance

    @SceneBuilder var body: some Scene {
        WindowGroup {
            NavigationView {
                StartView()
            }
            .sheet(isPresented: $workoutManager.showingSummaryView) {
                SummaryView()
            }
            .environmentObject(workoutManager)
            .environmentObject(split)
        }
    }
}Okay, now we are prepared to add useful Swift event tracking to our app.
Calling the Split SDK to Turn On Event Tracking
Recall that we are interested in what workouts are most popular. In StartView.swift, we already generate a list of NavigationLinks, as shown below:
var workoutTypes: [HKWorkoutActivityType] = [.cycling, .running, .walking]

var body: some View {
    List(workoutTypes) { workoutType in
        NavigationLink(
            workoutType.name, destination: SessionPagingView(),
            tag: workoutType, selection: $workoutManager.selectedWorkout
        )
        .padding(EdgeInsets(top: 15, leading: 5, bottom: 15, trailing: 5))
    }
    .listStyle(.carousel)
    .navigationBarTitle("Workouts")
    .onAppear {
        workoutManager.requestAuthorization()
    }
}Below is the StartView in action:
To add Swift event tracking, we first reference the SwiftWrapper in StartView by declaring the EnvironmentObject like this:
@EnvironmentObject var split: SplitWrapperNext, we add the onAppear function to the NavigationLink with the following code for Split:
if "on" == split.eval("track_workouts") {
	_ = split.track("\(workoutType.name)_workout")
	_ = split.track("some_workout")
	split.flush()
}The split.eval("track_workouts") call evaluates the feature flag that will allow us to turn event tracking on or off from Split’s web-based Management Console. The split.track() calls each send an event to Split Cloud. We will later configure Split to use these events to calculate the popularity of the different workout selections. For convenience, we have the split.flush() call to send cached data (e.g. events) to Split cloud, viewable on the Management Console.
We will also add disabled and overlay functions to the List to wait for Split to instantiate and download definitions.
The complete StartView.swift file now looks like this:
/*
 See LICENSE folder for this sample's licensing information.
 Abstract: The start view.
*/

import HealthKit
import SwiftUI

struct StartView: View {
    @EnvironmentObject var workoutManager: WorkoutManager
    @EnvironmentObject var split: SplitWrapper

    var workoutTypes: [HKWorkoutActivityType] = [.cycling, .running, .walking]

    var body: some View {
        List(workoutTypes) { workoutType in
            NavigationLink(
                workoutType.name,
                destination: SessionPagingView().onAppear {
                    if "on" == split.eval("track_workouts") {
                        _ = split.track("\(workoutType.name)_workout")
                        _ = split.track("some_workout")
                        split.flush()
                    }
                },
                tag: workoutType,
                selection: $workoutManager.selectedWorkout
            )
            .padding(EdgeInsets(top: 15, leading: 5, bottom: 15, trailing: 5))
        }
        .listStyle(.carousel)
        .navigationBarTitle("Workouts")
        .onAppear {
            workoutManager.requestAuthorization()
        }
        .disabled(!split.isReady && !split.isReadyTimedOut)
        .overlay(loadingOverlay)
    }

    @ViewBuilder private var loadingOverlay: some View {
        if !split.isReady && !split.isReadyTimedOut {
            ProgressView()

        }
    }
}

struct StartView_Previews: PreviewProvider {
    static var previews: some View {
        StartView()
            .environmentObject(WorkoutManager())
            .environmentObject(SplitWrapper.instance)
    }
}

extension HKWorkoutActivityType: Identifiable {
    public var id: UInt {
        rawValue
    }

    var name: String {
        switch self {
        case .running:
            return "Run"
        case .cycling:
            return "Bike"
        case .walking:
            return "Walk"
        default:
            return ""
        }
    }
}That is it! From the code side, we are good to go to send events to Split.
Getting Your Split API Key
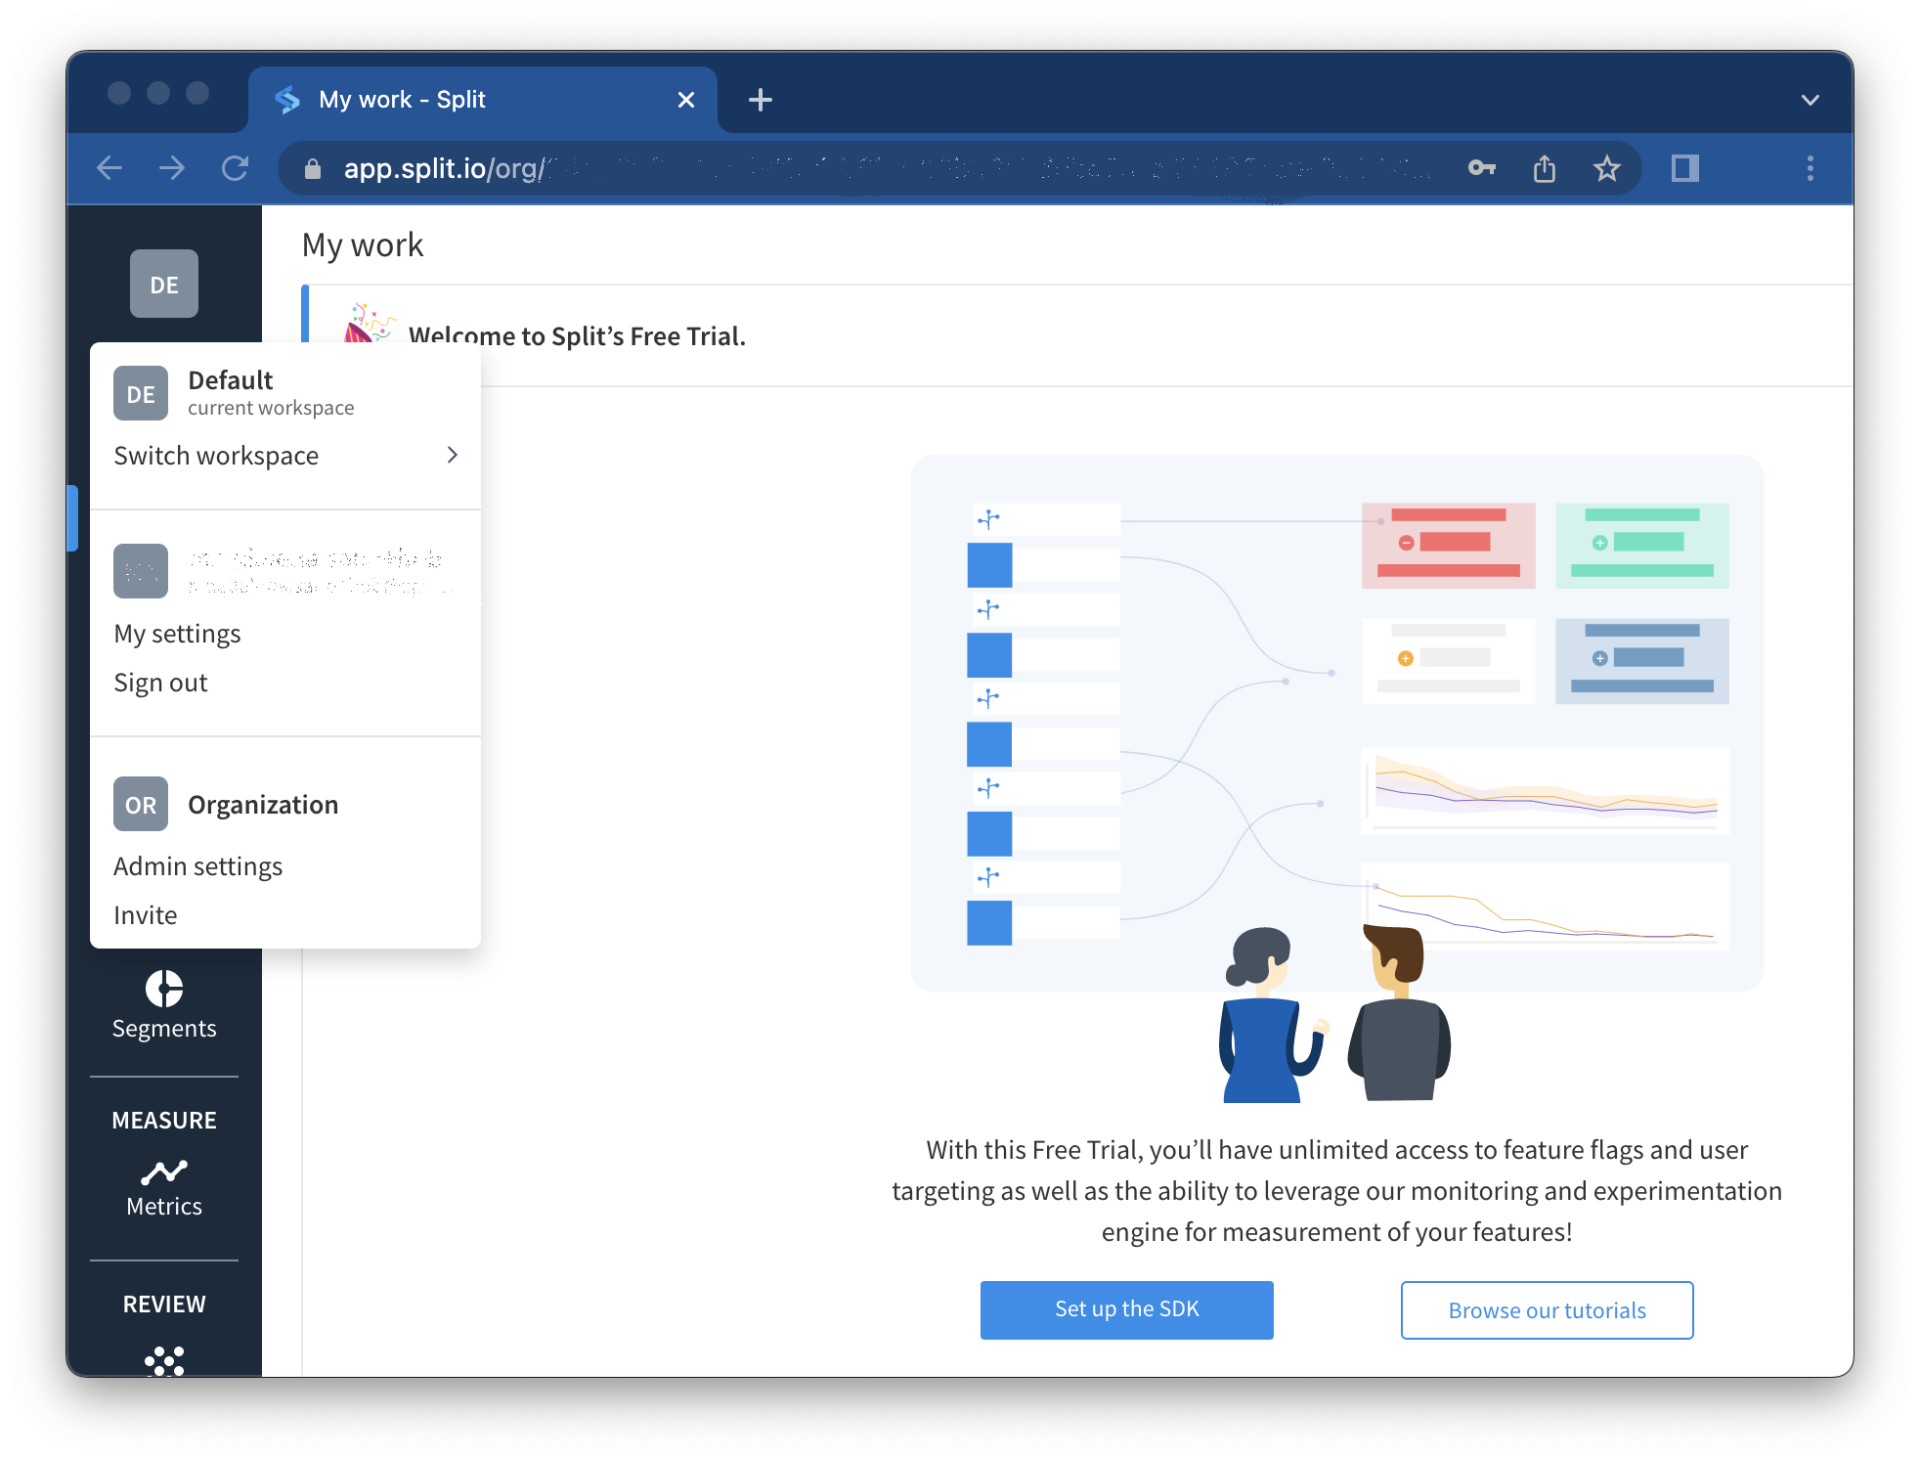
We need a valid API key for our app to interact with Split and then just set up our feature flag and event tracking metrics. The API keys are generated within the web-based Split Management Console. Log in to Split or sign up for your free trial.
In the Management Console, click the gray square labeled “DE” at the top left corner and select “Admin settings”.
In the light gray navigation menu, select “API keys”.
Copy the client-side API key from the chart, taking note of the environment that the key is associated with, as shown in the “Environments” column.

Now let’s return to Xcode, to your SwiftWrapper.swift file. Paste the API key as the value of apiKey, at the following line:
private let apiKey = "[front-end (client-side) Split API Key goes here]"Creating a Feature Flag (A.K.A. Split)
Recall that we referenced a track_workouts feature flag to turn on event tracking in the code:
if "on" == split.eval("track_workouts") {
// your code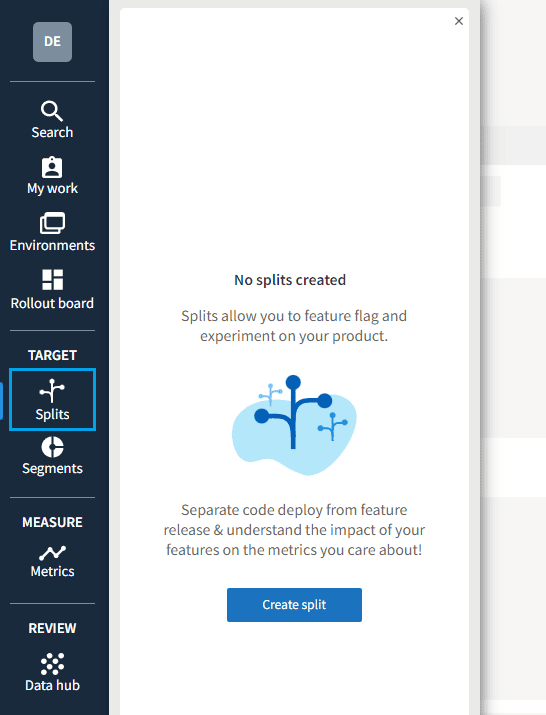
}We will now define this feature flag in Split. In the Split Console, click “Splits” (split is synonymous with feature flag), and then “Create split”.
Define the feature flag with the following settings:

Click “Create” and you’ve added the track_workouts feature flag to your Split definitions.
Adding Targeting Rules for Your Feature Flag
Targeting rules allow you to control the string values (treatments) that a feature flag returns to your code. This can be based on a variety of criteria, including randomization, and it’s useful for feature experimentation and rollouts. For our purposes, we will simply ensure our track_workouts feature flag returns on.
Viewing the split definition, make sure you have the correct environment selected, and click to “Add Rules” to the split.
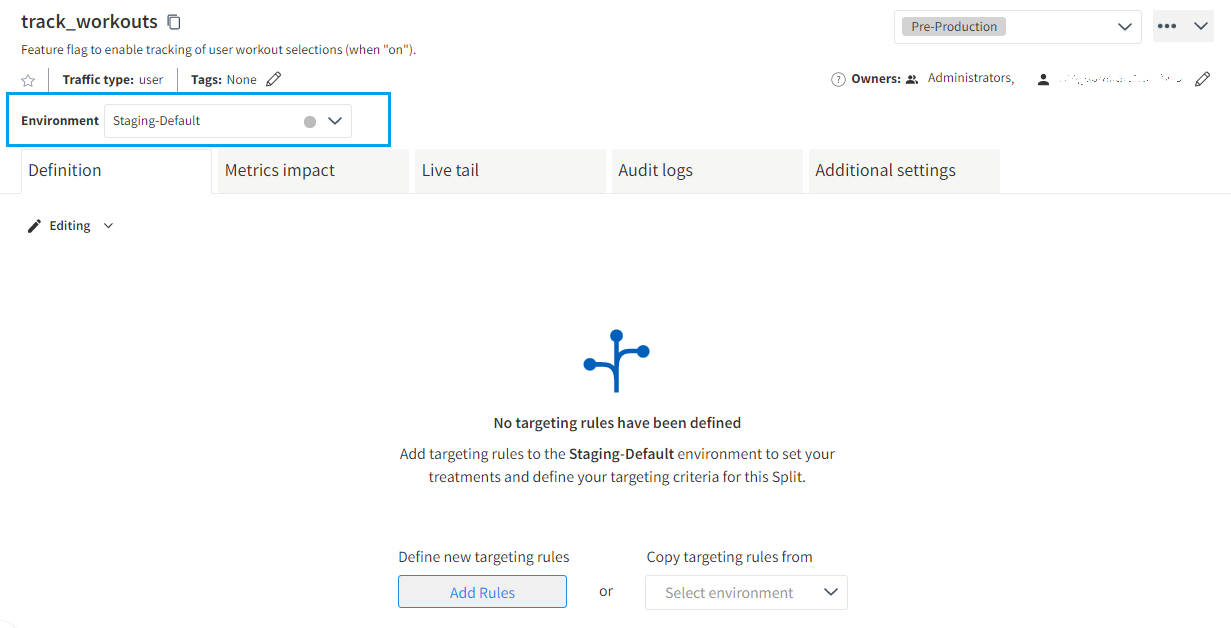
Then set your Default Rule to serve on as shown below.

Now click “Review changes” and “Save”.
With this set up, the split.eval("track_workouts") call in our watchOS app’s StartView will return the string on.
Viewing Incoming Events In Split
Recall that in our swift code, we are sending events to Split cloud using the track function:
_ = split.track("\(workoutType.name)_workout")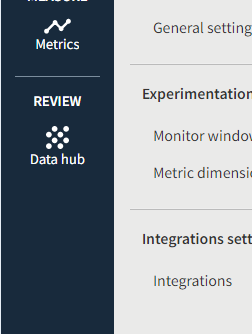
_ = split.track("some_workout")Now, to check that the events are coming in, click “Data hub”:
Make sure your Environment matches that of your API key, click on the “Live tail” tab, and change the Data type to “Events”.

Click the “Query” button.
Now run or debug your code and you will see events coming into Split cloud when you click a workout.
Pretty cool.
Have fun clicking the workouts and seeing the events appear in Split Console. We will use these events to create three metrics in the next section.
Creating Your Metrics In Split
Let’s create metrics for analysis of our tracking events. Click ‘Metrics’ and then ‘Create metric’.

Set up a metric with properties as shown below:

Similarly, we will need to set up another metric for the bike_ratio and a third metric for the walk_ratio as well.
Viewing Your Split Metrics Results
To see your metrics in action, click “Splits”, select track_workouts to open the split definition, and click on the “Metrics impact” tab. You should notice three shiny new metrics cards, as shown below:

On the ‘Metrics impact’ tab, you will find a small but very handy button link: ‘Recalculate metrics’.

Click on it, and notice the ‘in progress’ label beside it.

We will need to wait a few moments until this label disappears. Now may be a good time to take a few minutes to treat yourself to a refreshing or invigorating drink and contemplate your excellent progress with Split and data-driven development.
When you have returned, notice “in progress” has disappeared. You can refresh your browser page and you should see your workout ratios, as shown below.

That’s it! Now you can see your users’ workout choices. You can stop tracking these events instantly from the Split Management Console by setting the track_workouts feature flag default treatment to off. Switch it to anything other than on as defined in your swift watchOS code or by deleting (killing) the flag altogether. You can also tweak the definition of the feature flag and add some user parameters in your code. This will activate tracking for a finely-tuned subset of users, according to criteria that you define in the Split Management Console. That’s a lot of power at your fingertips.
Wrap Up
With Split’s event tracking capabilities, it can take the guesswork out of watchOS feature development and code with confidence. With this simple example as a springboard, we hope this inspires some great ideas of your own for leveraging the Split Feature Data Platform to your advantage.
Now you can enjoy a comfortable two-way conversation with your customers, and fully engage your users with your perfectly targeted and expertly honed, data-driven development.
Complete code featured in this article is available here, with a tip of the hat to Javier Avrudsky on the Split Team for excellent guidance. Checkout the Split_event_tracking_demo tag.
Get Split Certified
Split Arcade includes product explainer videos, clickable product tutorials, manipulatable code examples, and interactive challenges.
Switch It On With Split
Split gives product development teams the confidence to release features that matter faster. It’s the only feature management and experimentation platform that automatically attributes data-driven insight to every feature that’s released—all while enabling astoundingly easy deployment, profound risk reduction, and better visibility across teams. Split offers more than a platform: It offers partnership. By sticking with customers every step of the way, Split illuminates the path toward continuous improvement and timely innovation. Switch on a trial account, schedule a demo, or contact us for further questions.