
If I had to bet, I’d say that if you’re a modern app developer you’ve heard of progressive web applications (PWAs) before. If you want to know more about this type of application, you’ve come to the right place. After reading this post, you’ll not only understand what PWAs are and what advantages they provide, but you’ll have written your first Angular PWA app.
To top it off, we’ll also add another ingredient to the mix: feature flags. You’ll learn what this mechanism is, what it’s used for, and how to add the benefits of feature flags to your app using Split. Let’s dig in.

Angular PWA: The Basics
Let’s start with the fundamentals by defining PWAs in detail and explaining what they are and why they’re worth your time. We’ll do the same with feature flags, covering both the “what” and “why” of them. Finally, we’ll walk you through everything you’ll need to start building your first PWA in Angular.
PWA: What Is It? Why Care?
PWA stands for progressive web application. The term refers to an application built using technologies such as HTML, JavaScript, and CSS and is delivered through the web. In case you think that sounds curiously close to a simple website, you’re not so far off. Let’s understand the properties of a PWA in more detail and how they differ from both regular sites and native mobile applications.
PWAs are built on a series of premises that have the goal of delivering an app-like experience. These apps leverage modern browser capabilities to provide a smooth user experience, even in the case of a poor connection—or no connection at all.
PWAs are made possible by the capabilities of modern browsers. One of those capabilities is the feature known as service workers. A service worker allows features such as push notifications and background sync. That’s possible because workers are run in the background by the browser. That way, they enable functionality that doesn’t rely on user interaction with elements on a web page.
Requirements for Your Angular PWA with Feature Flags
The first requirement you’ll need to build your app is Node.js.
When Node is installed, open your terminal and run the following command:
node --version
If the installation went well, you should see the correct version number.
Now, if you don’t already have the Angular framework installed, install it using the following command:
npm install -g @angular/cli@11.1.3
You can also test Angular’s version by running this command:
ng --version
Unlike Node.js, Angular returns a complete result that includes its own version number, the Node.js version, information about the operating system, and the version information for individual Angular components.
Angular CLI: 11.1.3
Node: 14.10.0
OS: darwin x64
Angular: 11.1.2
...
Ivy Workspace: Yes
Package Version
---------------------------------------------------------
@angular-devkit/architect 0.1101.3
@angular-devkit/build-angular 0.1101.3
@angular-devkit/core 11.1.3
@angular-devkit/schematics 11.1.3
@angular/cli 11.1.3
@angular/flex-layout 11.0.0-beta.33
@schematics/angular 11.1.3
@schematics/update 0.1101.3
rxjs 6.6.3
typescript 4.1.3Code language: Elixir (elixir)Time to Start Coding Your Angular App
The app you’ll build is a simple PWA that consumes the GitHub API. It allows you to search for a GitHub username and then display the available repositories for that user.
Start by creating a new Angular app using the Angular CLI:
ng new angular-pwa
Angular CLI will ask if you want to enforce stricter type checking. You can answer with the default of No. Angular CLI will then ask you if you’d like to add Angular routing to your app. Answer yes. Then, you’ll be asked which style of CSS you’d like to use. Pick the first option (vanilla CSS).
NOTE: It can take some time to install the dependencies for the Angular app. Go grab a cup of coffee, and in a few minutes (or less), it will be done.
By this point, it’s advisable to test whether everything is OK. Serve your application by running this:
cd angular-pwa
ng serve
Then, open your favorite browser and go to http://localhost:4200. You should see something like this:
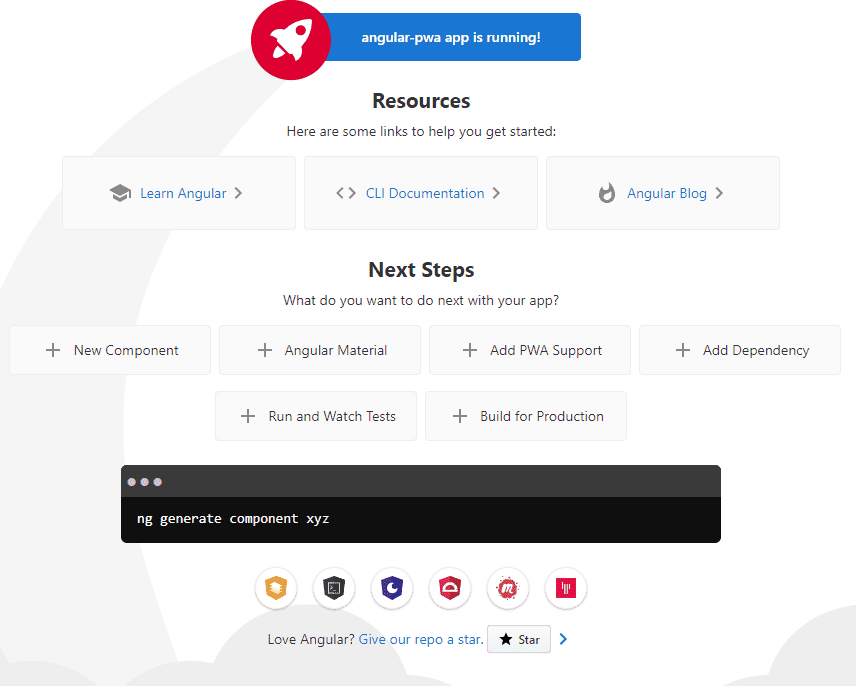
The next step is to add the Angular Material package to your project. Angular Material is a UI library you can use to make sure your app looks great and behaves correctly, no matter what device is used to access it. To install Angular Material, exit the running application (usually with ctrl+c) and just run the following command:
npm install @angular/material@11.1.2 @angular/cdk@11.1.2 @angular/animations@11.1.2 @angular/flex-layout@11.0.0-beta.33
Executing the command above will install—via npm—all of the necessary packages you need to work with Angular Material. After the installation is complete, you’ll be ready to start coding your app. Start by declaring the imports for the Angular Material modules you’ll need. Open the src/app/app.module.ts file and replace its contents with the following code:
import { BrowserModule } from '@angular/platform-browser';
import { NgModule } from '@angular/core';
import { HttpClientModule } from '@angular/common/http';
import { FormsModule, ReactiveFormsModule } from '@angular/forms';

import { BrowserAnimationsModule } from '@angular/platform-browser/animations';
import { FlexLayoutModule } from "@angular/flex-layout";

import { MatToolbarModule } from '@angular/material/toolbar';
import { MatIconModule } from '@angular/material/icon';
import { MatCardModule } from '@angular/material/card';
import { MatButtonModule } from '@angular/material/button';
import { MatTableModule } from '@angular/material/table';
import { MatDividerModule } from '@angular/material/divider';
import { MatProgressSpinnerModule } from '@angular/material/progress-spinner';
import { MatMenuModule } from '@angular/material/menu';

import { AppRoutingModule } from './app-routing.module';
import { AppComponent } from './app.component';

@NgModule({
  declarations: [
    AppComponent,
  ],
  imports: [
    BrowserModule,
    HttpClientModule,
    BrowserAnimationsModule,
    FlexLayoutModule,
    FormsModule,
    ReactiveFormsModule,
    MatToolbarModule,
    MatMenuModule,
    MatIconModule,
    MatCardModule,
    MatButtonModule,
    MatTableModule,
    MatDividerModule,
    MatProgressSpinnerModule,
    AppRoutingModule
  ],
  providers: [],
  bootstrap: [AppComponent]
})
export class AppModule { }Code language: JavaScript (javascript)
The src/app/app.component.html file is the template for your app’s main component. Open the file and replace its contents with this:
<mat-toolbar color="primary" class="expanded-toolbar">
  <span>
    <button mat-button routerLink="/">{{title}}</button>
    <button mat-button routerLink="/"><mat-icon>home</mat-icon></button>
  </span>
  <div fxLayout="row" fxShow="false" fxShow.gt-sm>
      <form [formGroup]="searchForm" (ngSubmit)="onSearch()">
        <div class="input-group">
          <input class="input-group-field" type="search" value="" placeholder="Search" formControlName="search">
          <div class="input-group-button"><button mat-flat-button color="accent"><mat-icon>search</mat-icon></button></div>
        </div>
      </form>
  </div>
  <button mat-button [mat-menu-trigger-for]="menu" fxHide="false" fxHide.gt-sm>
   <mat-icon>menu</mat-icon>
  </button>
</mat-toolbar>
<mat-menu x-position="before" #menu="matMenu">
  <button mat-menu-item routerLink="/"><mat-icon>home</mat-icon> Home</button>

  <form [formGroup]="searchForm" (ngSubmit)="onSearch()">
    <div class="input-group">
      <input class="input-group-field" type="search" value="" placeholder="Search" formControlName="search">
      <div class="input-group-button"><button mat-button routerLink="/"><mat-icon>magnify</mat-icon></button></div>
    </div>
  </form>
</mat-menu>
<router-outlet></router-outlet>Code language: Django (django)
Now, make your app look a bit cooler by adding some CSS to it. Go to the src/styles.css and paste the following code into it:
@import "~@angular/material/prebuilt-themes/indigo-pink.css";

body {
  margin: 0;
  font-family: sans-serif;
}

h1, h2 {
  text-align: center;
}

.input-group {
  display: flex;
  align-items: stretch;
}

.input-group-field {
  margin-right: 0;
}

.input-group .input-group-button {
  margin-left: 0;
  border: none;
}

.input-group .mat-flat-button {
  border-radius: 0;
}Code language: CSS (css)
The first line in the style sheet above applies a predefined theme to your app. That line is required to make the Angular Material components look correct. You also need to add some styling to the toolbar. Go to the src/app/app.component.css file and add the following content to it:
.expanded-toolbar {
  justify-content: space-between;
  align-items: center;
}Code language: CSS (css)
There’s one Angular Material–related change left for you. Open the src/index.html file and add the following line immediately before the closing tag:
<link href="https://fonts.googleapis.com/icon?family=Material+Icons" rel="stylesheet">Code language: Django (django)This line includes the special icon font that Material uses for icons. The font is hosted on Google’s CDN.
Everything you did up to this point is pure aesthetics. It’s now time to start adding the actual logic to your app. You’ll start by implementing a search feature. Open the src/app/app.component.ts file and replace its contents with this:
import { Component } from '@angular/core';
import { FormGroup, FormBuilder, Validators } from '@angular/forms';
import { Router } from "@angular/router";

import { RepositoriesService } from './repositories/repositories.service';

@Component({
  selector: 'app-root',
  templateUrl: './app.component.html',
  styleUrls: ['./app.component.css']
})
export class AppComponent {
  title = 'AngularGitHubRepositoriesPWA';
  searchForm: FormGroup;

  constructor(private formBuilder: FormBuilder,
              private router: Router) {
  }

  ngOnInit() {
    this.searchForm = this.formBuilder.group({
      search: ['', Validators.required],
    });
  }

  onSearch() {
    if (!this.searchForm.valid) return;
    this.router.navigate(['search'], { queryParams: {query: this.searchForm.get('search').value}});
  }
}Code language: JavaScript (javascript)
What does the above code do? In a nutshell, it calls the onSearch() function as soon as a user submits the form. The call is then forwarded to the router, appending the query to the URL and making it available to the search route.
The router is responsible for selecting the appropriate component to handle the search.
Creating a Repositories Service for Your PWA
For the next step, open your terminal and run the following command:
ng generate service repositories/repositories
After you run this command, Angular will generate two files you’ll use to create the service needed to fetch data from the GitHub API. Open the repositories/repositories.service.ts file. Update its contents to the following:
import { Injectable } from '@angular/core';
import { HttpClient, HttpParams } from '@angular/common/http';

const baseUrl = 'https://api.github.com/users/';

@Injectable({
  providedIn: 'root'
})
export class RepositoriesService {

  constructor(private http: HttpClient) { }

  async get(route: string, data?: any) {
    const url = baseUrl+route;
    let params = new HttpParams();

    if (data!==undefined) {
      Object.getOwnPropertyNames(data).forEach(key => {
        params = params.set(key, data[key]);
      });
    }

    const result = this.http.get(url, {
      responseType: 'json',
      params: params
    });

    return new Promise<any>((resolve, reject) => {
      result.subscribe(resolve as any, reject as any);
    });
  }

  searchRepositoriesForUser(user: string) {
    return this.get(`${user}/repos`);
  }
}Code language: JavaScript (javascript)
As you can see, the searchRepositoryForUser method takes a username as a parameter. It then uses that value to come up with the complete URL for the endpoint you need to reach.
Generate Angular Components for Your PWA Using the Angular CLI
For the next step, you’ll use Angular CLI to create two new components. Run the following commands:
ng generate component home
ng generate component search
After the components are generated, you’ll need to link them to specific routes. Open the src/app/app-routing.module.ts file and add the following content to it:
import { NgModule } from '@angular/core';
import { Routes, RouterModule } from '@angular/router';
import { HomeComponent } from './home/home.component';
import { SearchComponent } from './search/search.component';

const routes: Routes = [
  { path: '', component: HomeComponent },
  { path: 'search', component: SearchComponent },
];

@NgModule({
  imports: [RouterModule.forRoot(routes)],
  exports: [RouterModule]
})
export class AppRoutingModule { }Code language: JavaScript (javascript)
The Home component will simply feature some text. Open the src/app/home/home.component.html file and paste the following text into it:
<h1>Angular GitHub Repositories PWA</h1>
<h2>A basic PWA to let you see your repos!</h2>
Let’s now implement the search component. You’ll do that by updating the src/app/search/search.component.ts file with the following content:
import { Component, OnInit } from '@angular/core';
import { ActivatedRoute, Router } from '@angular/router';
import { MatTableDataSource } from '@angular/material/table';
import { RepositoriesService } from '../repositories/repositories.service';
import { Subscription } from 'rxjs';
@Component({
selector: 'app-search',
templateUrl: './search.component.html',
styleUrls: ['./search.component.css']
})
export class SearchComponent implements OnInit {
private subscription: Subscription;
displayedColumns: string[] = ['name', 'html_url', 'fork', 'created_at'];
repositories = new MatTableDataSource<any>();
constructor(private route: ActivatedRoute,
private router: Router,
private repositoriesService: RepositoriesService) { }
ngOnInit() {
this.subscription = this.route.queryParams.subscribe(params => {
this.searchRepositoriesForUser(params['query']);
});
}
ngOnDestroy() {
this.subscription.unsubscribe();
}
async searchRepositoriesForUser(query: string) {
const results = await this.repositoriesService.searchRepositoriesForUser(query);
this.repositories.data = results;
}
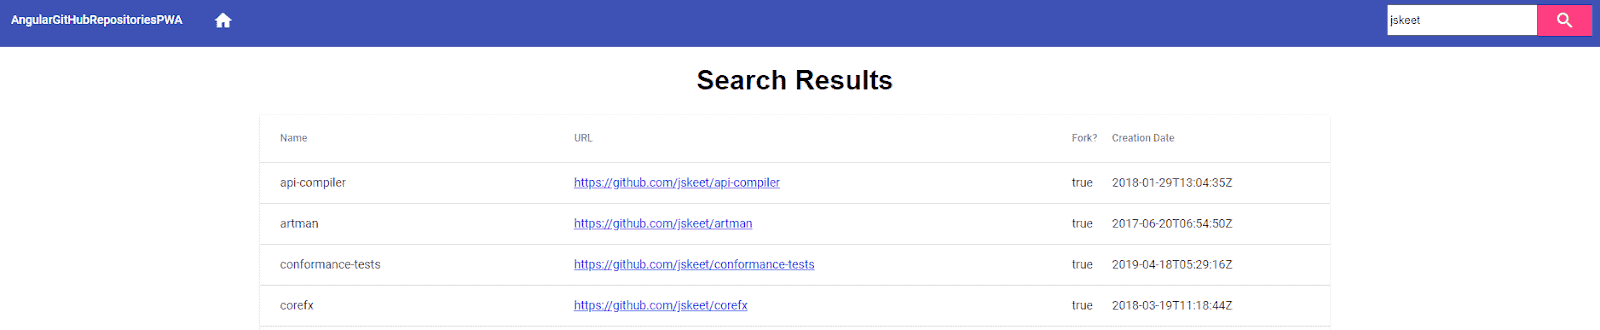
}Code language: JavaScript (javascript)What does this code do? In short, the code obtains the search query during the component’s initialization. When the search query changes, the code calls the searchRepositoriesForUser method, which, in turn, delegates the call to the RepositoriesService. The service sends a request to the GitHub API and obtains the list of repositories for the specified user. Finally, the Angular Material library is used to display a table with the results via a MatTableDataSource object that receives the resulting list.The next step is to edit the template file. The search template will feature a simple table to display the results of the search. So, open the src/app/search/search.component.html file and update its contents with the following code:
<h1 class="h1">Search Results</h1>
<div fxLayout="row" fxLayout.xs="column" fxLayoutAlign="center" class="products">
  <table mat-table fxFlex="100%" fxFlex.gt-sm="66%" [dataSource]="repositories" class="mat-elevation-z1">
    <ng-container matColumnDef="name">
      <th mat-header-cell *matHeaderCellDef>Name</th>
      <td mat-cell *matCellDef="let repository"> {{repository.name}} </td>
    </ng-container>
    <ng-container matColumnDef="html_url">
      <th mat-header-cell *matHeaderCellDef>URL</th>
      <td mat-cell *matCellDef="let repository"><a href="{{repository.html_url}}" target="new">{{repository.html_url}}</a> </td>
    </ng-container>
    <ng-container matColumnDef="fork">
      <th mat-header-cell *matHeaderCellDef>Fork?</th>
      <td mat-cell *matCellDef="let repository">{{repository.fork}}</td>
    </ng-container>
    <ng-container matColumnDef="created_at">
      <th mat-header-cell *matHeaderCellDef>Creation Date</th>
      <td mat-cell *matCellDef="let repository"> {{repository.created_at}} </td>
    </ng-container>
    <tr mat-header-row *matHeaderRowDef="displayedColumns"></tr>
    <tr mat-row *matRowDef="let row; columns: displayedColumns;"></tr>
  </table>
</div>Code language: Django (django)
By this point, you’re already able to run the app and see it in action:
Enter the Feature Flag
For the sake of the tutorial, let’s pretend that, instead of GitHub’s API, you were consuming a custom API created by a team from your company. Imagine also that this API wasn’t ready for use yet, and you wanted to return a bunch of placeholder values while the team of back-end developers finished the API. But since they might get their API finished soon, you’d want a way to swap the fake implementation for the real one without having to redeploy the application.
A handy way to accomplish that goal would be to create a flag to hide that feature. Let’s see how we can do that with Split.
Feature Flags: The What and Why
You might have come here for Angular PWA, but, as we’ve promised, you’ll also get feature flagging as part of the bargain. So, what are feature flags, and why should you care?
Feature flags—also called feature toggles and feature switchers, among other names—are mechanisms that allow you to disable or hide features from users. This capability is powerful and has many use cases, but here are some of the main ones we can mention:
- Feature flagging enables feature experimentation, a.k.a. A/B testing.
- It also enables canary releases (i.e., rolling out a new version for a small group of users so you can closely monitor it and roll it back if anything goes wrong).
- Perhaps, more importantly, feature flagging is an enabler of CI and CD since it empowers developers to integrate their work more often without having to rely on complex branching strategies to avoid shipping unfinished features.
In short, feature flagging is a powerful technique you can use to streamline your software release life cycle.
Set Up Split
Start by signing up for a free Split account and heading to your dashboard. You’ll see a “DE” button in the upper-left corner, which is the workspace button. Click on it, and then click on “Admin settings.”
After that, click on “API Keys” in the left panel. You’ll see the available keys for all of your environments. For this guide, you’ll use a JavaScript SDK key for the staging-default environment. Just click on “Copy,” and the key will be available in your clipboard.
Now head back to the terminal; it’s time to add the Split SDK to your project. It’s possible to do that in several ways. For this tutorial, let’s stick with npm:
npm install --save @splitsoftware/splitio@10.15.2
For the next step, you’ll have to make some changes to the code. First, let’s create a new class that will act as an abstraction to Split. Create a new file in src/app called splitio.service.ts and paste the following code into it:
import { Injectable } from '@angular/core';
import { SplitFactory } from '@splitsoftware/splitio';
import { fromEvent } from 'rxjs';

@Injectable()
export class SplitioService {

  splitio: SplitIO.ISDK;
  splitClient: SplitIO.IClient;
  isReady = false;
  treatments: SplitIO.Treatments;
  features: string[] = [    'feature_1',    'feature_2',    'feature_3'  ];

  constructor() { }

  initSdk(): void {
    // Running the SDK in 'off-the-grid' Mode since authorizationKey : 'localhost'
    // To bind a non 'off-the-grid' client, inject the real API Key
    this.splitio = SplitFactory({
      core: {
        authorizationKey: '<YOUR-API-KEY>',
        Key: 'ANONYMOUS_USER'
      },
      // In non-localhost mode, this map is ignored.
      features: {
        feature_1: 'off',
        feature_2: 'on',
        feature_3: 'v2'
      }
    });

    this.splitClient = this.splitio.client();

    // verify if sdk is initialized
    this.verifyReady();
  }

  private verifyReady(): void {
    const isReadyEvent = fromEvent(this.splitClient, this.splitClient.Event.SDK_READY);

    const subscription = isReadyEvent.subscribe({
      next() {
        this.isReady = true;
        console.log('Sdk ready: ', this.isReady);
      },
      error(err) {
        console.log('Sdk error: ', err);
        this.isReady = false;
      }
    });
  }

  isTreatmentOn(treatmentName: string) : boolean {
    let treatment = this.splitClient.getTreatment(treatmentName);
    let result = null;

    if (treatment === 'on') {
      result = true;
    } else if (treatment === 'off') {
      result = false;
    } else {
      throw new Error('Unable to reach Split.' + treatment);
    }

    return result;
  }
}Code language: JavaScript (javascript)
The next step is to change the code of the Search component. You’ll add a dependency to the newly created service. The constructor will look like this:
constructor(private route: ActivatedRoute,
              private router: Router,
              private repositoriesService: RepositoriesService,
              private splitioService: SplitioService) { }Code language: Delphi (delphi)
Also, add the following line to the ngOnInit method:
this.splitioService.initSdk();Code language: CSS (css)Finally, change the searchRepositoriesForUser method so it looks like this:
async searchRepositoriesForUser(query: string) {
    const results = await this.repositoriesService.searchRepositoriesForUser(query);

    if (this.splitioService.isTreatmentOn('angular-pwa-demo')) {
      this.repositories.data = results;
    } else {
      this.repositories.data = [
        {
          name: 'placeholder',
          url: 'http://example.com',
          created_at: '2020-07-29',
          fork: true
        }
      ];
    }
  }Code language: C# (cs)
You might wonder whether you’re done yet, but the answer is “no.” There’s one step left: You have to configure Angular, so it knows to inject an instance of the Split service into the Search component. Let’s do it. Open the src/app/app.module.ts file and add the following import to it:
import { SplitioService } from './splitio.service';Code language: JavaScript (javascript)Now, go to the bottom of the file and locate a line that contains this:
providers: [],Code language: CSS (css)Replace that line with the following:
providers: [SplitioService],Code language: CSS (css)Here’s a quick recap of what you did:
- You’ve created a new class to act as an abstraction to Split.
- You’ve changed the code of the
Searchcomponent, making it depend on the newly created class. - You’ve changed the
searchRepositoriesForUsermethod so that it queries the Split service class to verify whether the treatment (that is, the feature flag) is active before returning the results. If the flag is off, the method returns a placeholder instead. - Finally, you’ve instructed Angular to inject an instance of SplitService into the
Searchcomponent.
Create Your First Feature Flag
The next step would be to create the actual treatment using Split. So, go back to your browser and head to your Split dashboard. Click “Create Split,” call it angular-pwa-demo, and click “Create.”
After that, click on “Add Rules” and “Save Changes,” and finally “Confirm.”
As you’ll notice, the default value for treatments is off. That prevents you from accidentally activating hidden features before they’re ready.
Now, you’re ready to try. Executing the app again, try to perform a search, and you’ll see that the actual results are no longer displayed; what you see instead are the placeholder values you coded.
Go back to your angular-pwa-demo Split definition. Switch the default to on and “Save Changes.” Now, search again, and you’ll see the real results.
This is the true power of feature flags: you didn’t have to restart your angular server nor change any code at all to get the “production” results.
Learn More About Feature Flags and Modern Software Delivery
In this post, we’ve walked you through the creation of a simple PWA with Angular. We’ve also covered the usefulness of feature flagging, explaining what this technique is all about and how you can implement it in your Angular applications using Split.
Feature flagging is a simple yet powerful idea. Leveraging feature flags gives you a lot of flexibility. Even though its primary use cases revolve around testing and experimentation, the possibilities are endless. The only limit is your imagination. Thanks for reading, and until the next time.
If you’d like to read more, we’ve got some awesome resources that’ll help expand your skills:
- Keystone Flags: Feature Flagging with Less Mess
- 7 Ways We Use Feature Flags at Split Every Day
- Site Reliability and Experimentation: They Go Hand in Hand
You can find the complete source code for the example in this post on GitHub.
This post was written by Carlos Schults. Carlos is a .NET software developer with experience in both desktop and web development, and he’s now trying his hand at mobile. He has a passion for writing clean and concise code, and he’s interested in practices that help you improve app health, such as code review, automated testing, and continuous build.
Get Split Certified
Split Arcade includes product explainer videos, clickable product tutorials, manipulatable code examples, and interactive challenges.
Deliver Features That Matter, Faster. And Exhale.
Split is a feature management platform that attributes insightful data to everything you release. Whether your team is looking to test in production, perform gradual rollouts, or experiment with new features–Split ensures your efforts are safe, visible, and highly impactful. What a Release. Get going with a free account, schedule a demo to learn more, or contact us for further questions and support.